Wednesday, August 2, 2023

Class 07 Activity – Area of Parallelogram

Activity – Area of Parallelogram 

Objective : 

To verify the formula for Area of a parallelogram or to verify the following formula. Area of a parallelogram = base x height

Materials Required : 

Squared paper, colour pencils,  a pair Of scissors, glue stick, geometry box, etc.,

Procedure:

On a  squared paper, draw a parallelogram ABCD. Draw. DE (height corresponding to the base AB). Shade the two parts using different colours.

2. Using a pair of scissors, cut out the triangle ADE.

3. Paste the triangular cutout ADE to the right side of BCDE such that AD and BC coincide.


Observations: 

In figure, we see that the resulting figure becomes a rectangle. 
So, area of the parallelogram = area of the rectangle = length x breadth
= CD X DE
= AB X DE  [AB = CD, opposite sides of a parallelogram are equal]
= Base x height 

Conclusion: 

From the above activity we find that Area of a parallelogram = base x height

Do Yourself: 

Draw three different parallelograms on squared papers. In each case, verify the formula for area of a parallelogram by paper cutting and pasting.


Saturday, July 29, 2023

Class 07 Project : Visualizing solid shapes

 Project : Visualizing solid shapes

Objective: 

Drawing cubes and cuboids.

Materials Required: 

Some sheets of isometric dot paper, sketch pen, pen, pencil, etc.

Procedure:

 I. To draw a cube of given dimensions (say a cube of edge 3 cm)

(In an isometric drawing, the measurements also agree with those of the solid.)

Take an isometric dot paper and draw two line segments AB and BC as shown below. 

Since the edge of the cube is 3 cm, we join four dots along each line to get the length of each line as 3 cm.

2. Now, draw three vertical lines AD, BE and CF as shown below. Here again, we join 4 dots along each line to get the length of each line as 3 cm.
3. Finally, join DE, EF. Also, draw DG || EF and FG || ED. The solid so obtained is a cube of edge 4 cm. Using a ruler measure each edge of the cube and verify.


You can also draw the cube by interchanging the steps 1 and 3 as shown below.


II. To draw a cuboid of given dimensions (say a cuboid of 4 cm x 2 cm x 3 cm)
1. Take an isometric dot paper and draw two line segments AB and BC as shown below. Here AB = 4 cm and BC = 2 cm. 
2. Now, draw three vertical line segments AD = BE = CF = 3 cm as shown below.
3. Finally, join DE and EF. Also, draw DG || EF and 
FG || ED. The solid so obtained is a cuboid of dimensions 4 cm x 2 cm x 3 cm. Measure each edge of the cuboid and verify.


Class 07 ACTIVITY 2 – TRIANGLES- Pythagoras Theorem

 ACTIVITY 2 – TRIANGLES- Pythagoras Theorem

Objective: 

To verify the Pythagoras theorem by paper cutting and pasting method.

Materials required: 

Squared paper, Colour pencils, a pair of scissors, glue stick, geometry box etc.,

Procedure:

1. On a squared paper, draw a right triangle ABC, right angled at B.

2. Draw squares on each side of the triangle as shown below.


3. Locate the centre of the square drawn on the longer leg of the ∆ABC. Mark it as 0. Draw DE ∥ AC, which passes through O. Draw FG such that ∠FOD = 90 °.
4. Cut out the square on side BC and the four pieces of the square on side AB.


5. Paste these five pieces over the square on the side AC as shown below. 

Observations:

In figure 5, we see that the square on side BC and the square on side AB (four pieces)completely cover the square on side AC. Or square on side AC = square on side AB + square on side BC. Or 
AC2 = AB2 + BC2

Conclusion: 

From the above activity, we can say that in a right triangle, the square on the hypotenuse is equal to the sum of the squares on the other two sides. 

Do Yourself: 

On a squared paper, draw two different right triangles. In each case verify the Pythagoras theorem by using the paper cutting and pasting method.


Class 07 ACTIVITY – TRIANGLES- Pythagoras Theorem

 ACTIVITY – TRIANGLES- Pythagoras Theorem

Objective: 

To verify the Pythagoras theorem by using a squared paper and shading the squares.

Materials Required: 

Squared papers, colour pencils, geometry box, etc.

Procedure:

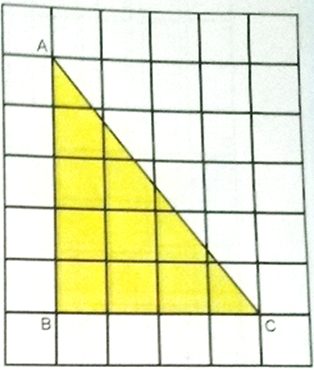
On a squared paper, draw a right triangle ABC whose legs 

(sides forming the right angle) are 3 cm and 4 cm,

 i.e.,(AB = 3 cm and BC = 4 cm. 

Measure the side AC of ∆ABC.

It is 5 cm. 

Shade the triangular region ABC. 

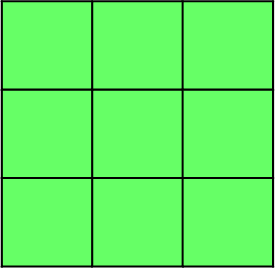
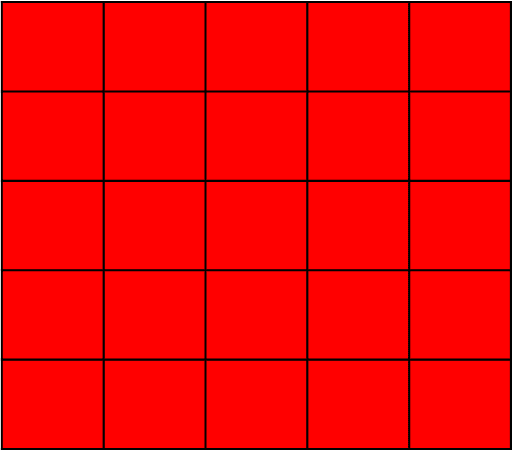
2. On another squared paper, draw three squares

 having sides 3 cm, 4 cm and 5 cm. 

Shade each square using different colours and cut them out.


3. Paste these squares along the sides of triangle ABC such that one side of square (a) (green coloured) falls along AB, one side of square (b) (blue coloured) falls along BC and one side of square (c) (red coloured) falls along AC.


Observations : 

In figure,
area of the square on side AB = number of small squares inside the square on AB = 9 cm2
Area of the square on side BC = number of small squares inside the Square on BC = 16 cm2
Area of the square on side AC = number of small squares inside the Square on AC = 25 cm2


We find that 9 + 16 = 25 or area of the square on side AB + area of the square on side BC = area of the Square on side AC or AB2 + BC2 = AC2

Conclusion

From the above activity, we can that in a right triangle, the square on the hypotenuse is equal to the sum of the squares on other two sides.

Do Yourself: 

on a squared paper, draw the following right triangles (a) AB = 8 cm, BC = 6 cm, ∠ B = 90 °

(b) PQ = 5 cm, QR = 12 cm, ∠ Q = 90 °

In each case, verify the Pythagoras theorem by shading the squares.


CBSE Worksheet: Class 6 Maths – Chapter: Patterns in Mathematics

  CBSE Worksheet: Class 6 Maths – Chapter: Patterns in Mathematics Subject: Mathematics   Chapter: Patterns in Mathematics Class: VI   M...