Sunday, May 25, 2025

Class 6 NCERT bridge course Answers Activity W4.3 shapes found around us.

 Activity W4.3- shapes found around us.  

Give children stamps of square and rectangular shapes found around us. 

Ask them to paste on a grid and calculate the number of grid squares covered by each one of them.


Activity W4.3 – Area Using Objects

Activity W4.3: Area Using Everyday Shapes

Give children **stamps or cutouts** of square and rectangular shapes from everyday objects (like books, boxes, tiles, etc.). Ask them to paste these on a **square grid sheet** and calculate the number of grid squares covered by each shape.

Example Images:

Children will place rectangular objects on a grid like this

Example: A matchbox covering 4 squares (2 × 2)

Step-by-Step Activity:

  1. Provide children square grid paper and shape cutouts.
  2. Children paste the shape on the grid.
  3. They count how many full squares it covers.
  4. Record and tabulate their answers.

Examples:

Example 1:
A square stamp covering 3×3 squares.
Area = 3 × 3 = 9 square units
Example 2:
A book cutout covering 5 rows and 2 columns.
Area = 5 × 2 = 10 square units
Conclusion:
The area of any square or rectangle is calculated by multiplying the number of grid squares along its length and width.
Area = Length × Breadth


By counting Squares for area
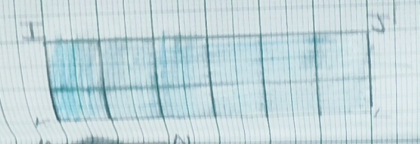
ABCD = 3 X 4 = 12 SQ UNITS
EFGH = 2 X 6 = 12 SQ UNITS
IJKL = 6 X 2 = 12 SQ UNITS
MNOP = 12 X 1 = 12 SQ UNITS
QRST = 1 X 12 SQ UNITS
UVWX = 4 X 3 = 12 SQ UNITS


Class 6 NCERT bridge course Answers Activity W4.4 Exploring Area Through Real-Life Objects

 Activity W4.4

 Exploring Area Through Real-Life Objects

Children may be asked to observe different objects such as books, Notebooks, the floor of the room etc. and try to device ways to find their areas.

Activity W4.4 — Exploring Area Through Real-Life Objects

Objective:

To help children understand the concept of area by observing and estimating the area of everyday rectangular and square objects.

Instructions:

Ask children to:

  1. Observe objects around them (like books, notebooks, classroom tiles, tables, etc.).

  2. Measure or estimate the length and breadth of the objects.

  3. Use the Area = Length × Breadth formula to find the area.

  4. Record their observations and compare different objects.

Examples:

ObjectEstimated LengthEstimated BreadthArea (L × B)Unit
Textbook25 cm18 cm450cm²
Notebook20 cm15 cm300cm²
Floor Tile60 cm60 cm3600cm²
Writing Table Top100 cm50 cm5000cm²
Expected Learning Outcome:

Children will understand:

  • How to measure or estimate dimensions.

  • That different objects can have the same area but different shapes.

  • That area is a measure of how much surface an object covers.

Extension Idea:

Encourage kids to:

  • Draw their objects on graph paper.

  • Create a mini "Area Museum" where they paste cutouts of real items with calculated area.

Activity W4.4 - Area Explorer

Activity W4.4 - Area Explorer Game

Instructions:

Drag the shapes onto the grid to simulate measuring area of books, notebooks, etc.

Each grid square = 1 unit². Use the shapes below to represent real-life objects.

2x1
3x2

Class 6 NCERT bridge course Answers Activity W4.2 Identifying Properties of Squares and Rectangles for Finding Area

 Identifying properties of squares and rectangles for finding area 

Activity W4.2  

 Identifying Properties of Squares and Rectangles for Finding Area

Initially a game can be played in this way: 

 Make chits numbered from 1 to 12 and put them in a bag. 

 Give each child a sheet of square grid paper. 

 One child becomes the leader and picks up two chits and shows them to the others. 

Level 1: 

The rest have to draw the rectangle of those sides in their own square grid paper. 

It can be vertical or horizontal. 

 Suppose the numbers are 2 and 5. 

 Others will draw rectangles of sides 2 units and 5 units. 

Or 5 units and 2 units. 

One such could be - 

The aim is to fill the square grid. 

Level 2: 

The rest can think of the area and decide what sides they want to draw, e.g., 

if the numbers pulls out are 2 and 6, 

the children can draw either a rectangle 2 by 6 or 3 by 4 or 12 by 1. 

They may check if all these shapes cover the same area or not. 

Level 3: 

If the numbers pulled out are 2 and 8, the children can draw either 2 by 8, 4 by 4 or 1 by 16. 

Once they make different shapes, they can check whether all areas are the same or not. 

Through this activity, the students can generalise that, 

the area of a rectangle/square is the product of adjacent sides


Activity W4.2 – Identifying Properties of Squares and Rectangles for Finding Area

Objective

To help students explore and generalize that the area of a rectangle or square is the product of adjacent sides, using hands-on practice with grid paper.

Materials Needed

  • Square grid paper

  • Pen/Pencil

  • Chits numbered 1 to 12

  • A bag or box to draw chits from

How to Play

Preparation:

  1. Write numbers 1 to 12 on individual chits and put them in a bag.

  2. Each student gets a sheet of square grid paper.

  3. One student is chosen as the leader for each round.

Level 1: Direct Drawing

Step:

  • The leader picks two chits (e.g., 2 and 5).

  • Other students draw a rectangle of dimensions 2 units × 5 units or 5 units × 2 units.

 Example Answer:

  • A rectangle of 2 × 5 = 10 square units

  • Orientation doesn't matter (horizontal or vertical is fine)

Level 2: Area Matching

Step:

  • If the leader picks numbers 2 and 6, students must create any rectangle with the same area.

  • They can calculate the area:
    2 × 6 = 12 square units

Example Answers:

  • 3 × 4

  • 6 × 2

  • 1 × 12

  • 4 × 3

All of these have area = 12 square units.

Level 3: Area and Factorization

Step:

  • Leader picks numbers 2 and 8. Area = 2 × 8 = 16

  • Students find different pairs of factors of 16 and draw rectangles accordingly.

 Example Answers:

  • 1 × 16

  • 2 × 8

  • 4 × 4

Ask students:
➡️ Do they all have the same area?
➡️ Which one is a square?

What Students Discover

  • The area of a rectangle is always the product of its length and breadth.

  • Different dimensions can lead to the same area.

  • Squares are special rectangles with equal adjacent sides.

Generalization

Area = Length × Breadth
This applies to all rectangles and squares, regardless of orientation.

Extension Ideas

  • Compare perimeters of different shapes with the same area.

  • Design a tiling game to fill a larger grid using smaller rectangles.


Activity W4.3 - Properties of Squares & Rectangles

๐Ÿ”ฒ Activity W4.3: Identifying Properties of Squares and Rectangles

Rectangle Grid Example

In this activity, students will explore the **properties of rectangles and squares** to understand how area is calculated through hands-on practice.

๐ŸŽฒ Setup:

  • Make chits numbered from 1 to 12.
  • Give each child a sheet of square grid paper.
  • One child becomes the leader and picks up 2 chits randomly.

๐Ÿ”น Level 1:

Draw the rectangle using the 2 numbers as sides. The rectangle can be vertical or horizontal.

Example: Chits drawn = 2 and 5 → Possible rectangles: 2×5 or 5×2

๐Ÿ”ธ Level 2:

Think of **other combinations** with the same area.

Example: Chits drawn = 2 and 6 → Area = 12
Other options: 3×4 or 1×12
✔ All shapes cover an area of 12 square units.

๐Ÿ”ธ Level 3:

Find different combinations using multiplication of the given numbers to make rectangles of equal area.

Example: Chits drawn = 2 and 8 → Area = 16
Options: 2×8, 4×4, 1×16
✔ All rectangles/squares cover the same area.

๐Ÿ“Œ Conclusion:

๐Ÿ‘‰ The area of a rectangle or square is found by multiplying the adjacent sides.

General Rule: Area = Length × Breadth (or Side × Side for squares)

Class 6 NCERT bridge course Answers Activity W4.1 Exploring Area with Square Slips on a Grid

Activity W4.1: Explore Area with Square Slips
Instructions: Drag the green squares onto the grid to form rectangles or squares. Count how many slips you used, then press "Calculate Area". Use "Reset" to start again. Try different shapes!

 Activities for WEEK- 4

Activity W4.1 

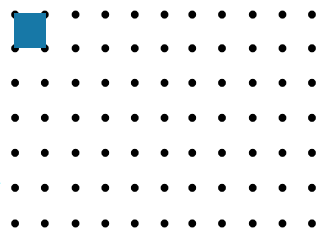
 Consider a grid. 

 Paste such square shaped slips on the grid and form squares and rectangles. 

One such is given below: 

 One such arrangement is: 

 Find the total number of such square slips in the above rectangular shape formed. 

 Tabulate the same. 

 This may give children an idea of calculating areas of squares and rectangles in a play way method 


Activity W4.1 – Exploring Area with Square Slips

Objective:

Help students understand area by forming rectangles using equal-sized square slips on a grid.

Instructions:

  1. Provide each student with:

    • A square grid sheet.

    • Several square-shaped slips (e.g., 1×1 cm paper squares).

  2. Ask them to arrange the slips to form larger rectangles or squares on the grid.

  3. Count how many slips were used.

  4. Record the length, breadth, and total number of slips (i.e., area).

 Example Arrangement:

Suppose students arrange 4 rows and 5 columns of square slips.

 Then:

LengthBreadthTotal Slips (Area)
5420
4520
They can try various combinations like:
  • 3 × 6 → Area = 18

  • 2 × 7 → Area = 14

  • 4 × 4 → Area = 16

Through repeated play, students understand:

Area = Length × Breadth

 Concept Generalized:

"The total number of square slips used to make a rectangle = Area = Length × Breadth"


WORKSHEET ch1 class 6

WORKSHEET - Number pattern 1)  1,3,5,7, ________, ___________,  _______ Rule- ________________ 2)  2,4,6,8,________, ___________,  _______ R...