Identifying properties of squares and rectangles for finding area
Activity W4.2
Identifying Properties of Squares and Rectangles for Finding Area
Initially a game can be played in this way:
Make chits numbered from 1 to 12 and put them in a bag.
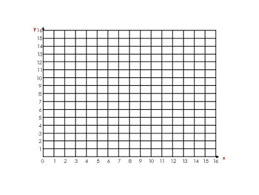
Give each child a sheet of square grid paper.
One child becomes the leader and picks up two chits and shows
them to the others.
Level 1:
The rest have to draw the
rectangle of those sides in their own
square grid paper.
It can be vertical
or horizontal.
Suppose the numbers are 2 and 5.
Others will draw rectangles of sides
2 units and 5 units.
Or 5 units and
2 units.
One such could be -
The aim is to fill the square grid.
Level 2:
The rest can think of the area and decide what sides they
want to draw, e.g.,
if the numbers pulls out are 2 and 6,
the children
can draw either a rectangle 2 by 6 or 3 by 4 or 12 by 1.
They may check if all these shapes cover the same area or not.
Level 3:
If the numbers pulled out are 2 and 8, the children can
draw either 2 by 8, 4 by 4 or 1 by 16.
Once they make different shapes,
they can check whether all areas are the same or not.
Through this activity, the students can generalise that,
the area of a
rectangle/square is the product of adjacent sides
Activity W4.2 – Identifying Properties of Squares and Rectangles for Finding Area
Objective
To help students explore and generalize that the area of a rectangle or square is the product of adjacent sides, using hands-on practice with grid paper.
Materials Needed
How to Play
Preparation:
-
Write numbers 1 to 12 on individual chits and put them in a bag.
-
Each student gets a sheet of square grid paper.
-
One student is chosen as the leader for each round.
Level 1: Direct Drawing
Step:
-
The leader picks two chits (e.g., 2 and 5).
-
Other students draw a rectangle of dimensions 2 units × 5 units or 5 units × 2 units.
Example Answer:
Level 2: Area Matching
Step:
-
If the leader picks numbers 2 and 6, students must create any rectangle with the same area.
-
They can calculate the area:
2 × 6 = 12 square units
Example Answers:
All of these have area = 12 square units.
Level 3: Area and Factorization
Step:
Example Answers:
Ask students:
➡️ Do they all have the same area?
➡️ Which one is a square?
What Students Discover
-
The area of a rectangle is always the product of its length and breadth.
-
Different dimensions can lead to the same area.
-
Squares are special rectangles with equal adjacent sides.
Generalization
Area = Length × Breadth
This applies to all rectangles and squares, regardless of orientation.
Extension Ideas

🔲 Activity W4.3: Identifying Properties of Squares and Rectangles
In this activity, students will explore the **properties of rectangles and squares** to understand how area is calculated through hands-on practice.
🎲 Setup:
- Make chits numbered from 1 to 12.
- Give each child a sheet of square grid paper.
- One child becomes the leader and picks up 2 chits randomly.
🔹 Level 1:
Draw the rectangle using the 2 numbers as sides. The rectangle can be vertical or horizontal.
Example: Chits drawn = 2 and 5 → Possible rectangles: 2×5 or 5×2
🔸 Level 2:
Think of **other combinations** with the same area.
Example: Chits drawn = 2 and 6 → Area = 12
Other options: 3×4 or 1×12
✔ All shapes cover an area of 12 square units.
🔸 Level 3:
Find different combinations using multiplication of the given numbers to make rectangles of equal area.
Example: Chits drawn = 2 and 8 → Area = 16
Options: 2×8, 4×4, 1×16
✔ All rectangles/squares cover the same area.
📌 Conclusion:
👉 The area of a rectangle or square is found by multiplying the adjacent sides.
General Rule: Area = Length × Breadth (or Side × Side for squares)