Sunday, May 18, 2025

Class 6 NCERT bridge course Answers Activity W2.1 Measuring and Comparing Lengths with Objects

 Activities for week 2
Activity W2.1 

Measuring and Comparing Lengths with Objects

 The students may be asked to measure the length of longer edges of mathematics textbook. 

 They may be asked to find the length of the boundary of the top of a table in the classroom using the above length. 

They may check how many such books can be arranged along the boundary of the top.

The same process may be done with the shorter edge of the book. 

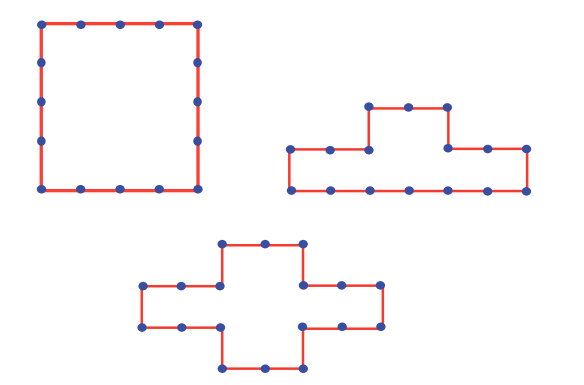
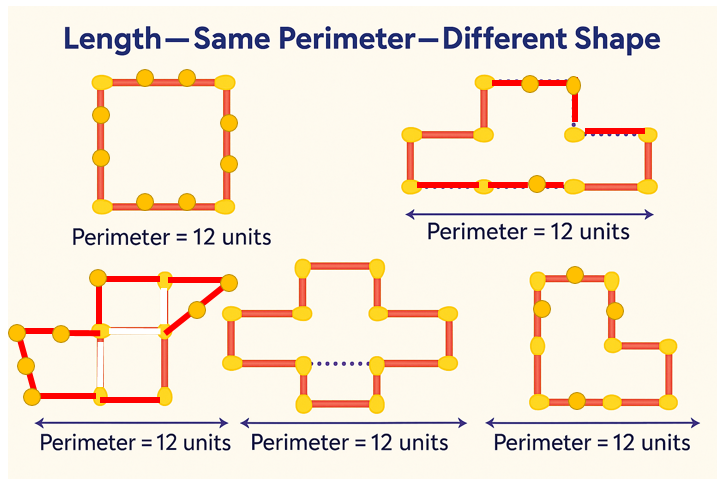
 They may check if there is any other object of different shape in the classroom having the same boundary length using the book. 

 They may use any other book or object, such as, pencil etc.


Activity W2.1: Measuring and Comparing Lengths with Objects

Objective

Students will explore length, perimeter, and spatial estimation by using a standard object (like a textbook or pencil) to measure and compare dimensions of classroom items.

Materials Needed

  • Mathematics textbook (preferably one per student or pair)

  • Ruler or measuring tape

  • Pencil or another regular object (optional)

  • Worksheet for recording answers

  • Camera/phone (for taking images if applicable)

  • A chart or board for group findings

Instructions

Step 1: Measure the Length of a Book

  • Ask students to measure the longer edge of their mathematics textbook.

    • Example: The longer edge = 25 cm

  • Then, measure the shorter edge.

    • Example: The shorter edge = 18 cm

Step 2: Measure the Table Top Boundary

  • Use the textbook’s length to estimate the perimeter (boundary) of the table top.

  • Students place the book end-to-end along the sides of the table.

  • Count how many books fit along each edge.

    Example:

    • Table top dimensions: 100 cm by 60 cm

    • Longer side of book = 25 cm

      • 100 cm ÷ 25 cm = 4 books

    • Shorter side of book = 18 cm

      • 60 cm ÷ 18 cm ≈ 3.33 books (~3 and a third)

    So:

    • Top side: 4 books

    • Side: 3 books

    • Total books around the boundary = 2(4 + 3) = 14 books approx.

Step 3: Compare with the Shorter Edge

  • Repeat the process using the shorter edge (18 cm) to measure the boundary.

  • See how the number of books needed changes.

Step 4: Find Another Object with Similar Perimeter

  • Ask students to find another object (e.g., a book, pencil box, or bag) with a similar boundary length.

  • Measure its perimeter using the same textbook edge.

  • Compare the number of books used.

Worksheet Example (Fill in the Blanks)

Item MeasuredMeasured ByObject Edge Used (cm)How Many Fit Along Each SideTotal Perimeter (Books)
TableTextbook25 cm (long edge)4 along long side, 3 along short side14 books
Chair seatTextbook18 cm (short edge)3 along each side12 books
Bag (zip edge)Pencil7 cm5 along top, 3 along side16 pencils


Learning Outcomes

  • Understand and apply the concept of length and perimeter.

  • Develop estimation and comparison skills.

  • Reinforce units of measurement in practical settings.

  • Improve spatial awareness using familiar classroom objects.

Saturday, May 17, 2025

Class 6 NCERT bridge course Answers Activity W1.5 The Reversing Digits Magic Trick

 Activity W1.5  The Reversing Digits Magic Trick

Ask the students to write a two-digit number whose digits are not the same.

 Let them reverse the number and subtract the smaller from the larger. 

 Ask them to repeat the process with the obtained answer till they reach a one-digit number. 

 Teacher may predict the one-digit number. 

 Let them sit in group and observe their calculations and identify the patterns in the intermediate answers.

 They may be asked to identify the two-digit numbers which will lead to a one-digit number in one step.

 Motivate them to play this trick with their family members and other friends.


Activity W1.5 – The Reversing Digits Magic Trick

“Subtract and Reveal the Secret!”

Objective:

To discover number patterns through reversing and subtracting digits of 2-digit numbers.

Instructions:

  1. Think of any two-digit number (digits should not be the same).

  2. Reverse the digits to form another number.

  3. Subtract the smaller number from the larger one.

  4. If the result is not a one-digit number, repeat the process:

    • Reverse it

    • Subtract again

  5. Continue until you reach a one-digit number.

  6. Your teacher or friend will predict the final number!

Example 1:

  • Start with: 73

  • Reverse: 37

  • Subtract: 73 – 37 = 36

  • Reverse 36 → 63

  • Subtract: 63 – 36 = 27

  • Reverse 27 → 72

  • Subtract: 72 – 27 = 45

  • Reverse 45 → 54

  • Subtract: 54 – 45 =  9

 Final one-digit number is 9

Example 2:

  • Start with: 52

  • Reverse: 25

  • Subtract: 52 – 25 = 27

  • Reverse: 72

  • Subtract: 72 – 27 = 45

  • Reverse: 54

  • Subtract: 54 – 45 =  9

What’s the Pattern?

No matter which number you start with (as long as digits are different), you'll eventually end up with 9!

This is because of divisibility and digit difference:

  • The difference between a number and its reverse is always divisible by 9.

  • Eventually, all such differences reduce to 9.

Group Activity Suggestions:

  • Try it with different starting numbers.

  • Record how many steps it takes to reach 9.

  • Find which numbers reach 9 in just one step (like 91 – 19 = 72 → 72 – 27 = 45 → ... = 9).

  • Predict the number when your friend plays the trick!

Challenge:

Try with 3-digit numbers or explore what happens if the digits are the same. Does the trick still work?

Image: Flow of the Reversing Digits Trick


(Note: If you'd like a specific new image illustrating this exact flowchart — 73 → 37 → 36 → 63 → ... → 9 — just let me know and I’ll generate one for this activity.)

Class 6 NCERT bridge course Answers Activity W1.8 Length – Same Perimeter, Different Shapes

Activity W1.8  Length – Same Perimeter, Different Shapes

Ask the students to construct the following figures using ear buds/ matchsticks and observe the total length of their boundary. 

 The students may be asked to calculate the length of the boundary of these shapes.

 They may check if the lengths are the same. 

 Students may be encouraged to construct more shapes with the same boundary length.

 This will give them an idea that different shapes can have the same boundary length or perimeter.


Activity W1.8: Length – Same Perimeter, Different Shapes

Objective:

To help students understand that different shapes can have the same perimeter (boundary length), even if they look very different.

Instructions for Students:

  1. Use matchsticks or ear buds to construct various shapes as shown in the image.

  2. Count the number of matchsticks (or sides) used to create the boundary of each shape.

  3. Calculate the perimeter of each shape.

  4. Observe whether the perimeter is the same or different for each shape.

  5. Try creating new shapes using the same number of matchsticks to check if the perimeter stays the same.

Key Concept:

Shapes that look different can still have the same perimeter if the total length of their boundary is the same.

Understanding with the Image:

In the image you uploaded, the shapes are made using straight matchstick-like segments.

Let’s assume each red stick = 1 unit length.

Example Shapes from the Image:

Shape Description        No. of Matchsticks        Perimeter (units)
Big square (top left)        16 (4 per side × 4)                        16
Horizontal zig-zag shape (top right)        16            16
Cross-like shape (bottom)        16            16
All three shapes have the same perimeter of 16 units, though their appearances are completely different!

Encourage Students To:

  • Create new designs using 16 matchsticks.

  • Explore shapes with different areas but same perimeter.

  • Compare with shapes made from 12 or 20 matchsticks.

Example Questions and Answers:

  1. Q: Can two shapes with the same number of matchsticks have the same perimeter?
    A: Yes, if all matchsticks are of equal length, the perimeter will be the same.

  2. Q: Can their area be different?
    A: Yes, even if perimeter is the same, the area can change depending on the shape.

Suggested Activities:

  • Group challenge: Each group makes a different shape using 16 matchsticks.

  • Math art: Use matchsticks to form patterns with the same perimeter.

  • Measurement practice: Use rulers if ear buds are used instead of sticks.

Visual Summary Image :

The uploaded image is excellent. It visually shows:

  • Different shaped figures

  • Equal number of boundary segments

  • Ideal for classroom explanation


Class 6 NCERT bridge course Answers Activity W1.7 Matchstick Triangle Patterns

  Class 6 NCERT bridge course Answers Activity W1.7

Activity W1.7  

Matchstick Triangle Patterns

Matchstick activity: 

 Ask the students to make shapes using equilateral triangles with the help of matchsticks as given below: 

 Let them make more such chains by adding equilateral triangles. 

 Ask them to find out the number of matchsticks required in each step. 

Let them come up with a pattern. 

Some interactions through activities will expose students to the properties of shapes such as squares and rectangles.  


Activity W1.7 – Matchstick Triangle Patterns

Objective:

To explore patterns and geometry using equilateral triangles formed by matchsticks. Students observe how shapes grow and identify a numerical pattern.

Instructions for Students:

  1. Use matchsticks to make a chain of equilateral triangles as shown in the image.

  2. Begin with 1 triangle, then add more triangles by sharing sides where possible.

  3. Count the number of matchsticks required at each step.

  4. Identify and describe the pattern.

  5. Predict how many matchsticks will be needed for more triangles.

Step-by-Step Shape Formation:

From the image:

StepNo. of TrianglesMatchsticks Used
113
225
337
449
Pattern Observation:
  • First triangle = 3 matchsticks

  • Every new triangle shares one side with the previous one, so we add only 2 more matchsticks for each new triangle.

Formula:

Matchsticks=3+2×(No. of triangles1)\text{Matchsticks} = 3 + 2 \times (\text{No. of triangles} - 1)

or simply,

Matchsticks=2n+1where n=number of triangles\text{Matchsticks} = 2n + 1 \quad \text{where } n = \text{number of triangles}

Examples:

  • For 5 triangles:
    2×5+1=112 × 5 + 1 = 11 matchsticks

  • For 10 triangles:
    2×10+1=212 × 10 + 1 = 21 matchsticks

  • For 20 triangles:
    2×20+1=412 × 20 + 1 = 41 matchsticks

Conclusion:

This activity helps students:

  • Understand patterns in geometric growth.

  • Practice counting and reasoning.

  • Learn properties of equilateral triangles, side-sharing, and efficiency in design.

Image Explanation:

The provided image clearly illustrates the chain pattern:

  • The triangles are equilateral and connected side-by-side.

  • Each new triangle reuses a side, reducing the total number of matchsticks needed.


SAT EXAM PREPARATION 2025-2026

 SAT EXAM PREPARATION 2025-2026 Question: There are 66 calories in 15 grams of grated Parmesan cheese, and 59% of those calories are from ...